Speidel Braumeister Plus 10 - A Review

My prize in the Braumarkt Challenge 2023 was a "Speidel Braumeister Plus 10l", a single-vessel brewing system made in Germany. I had never brewed on a Braumeister before, but I had always wanted to try it. In the past few weeks, I have brewed several batches with the Braumeister and would like to discuss its features, as well as its advantages and disadvantages in this article. If you want to find out if the Braumeister is the right brewing system for you, you've come to the right place.
Setup and Features
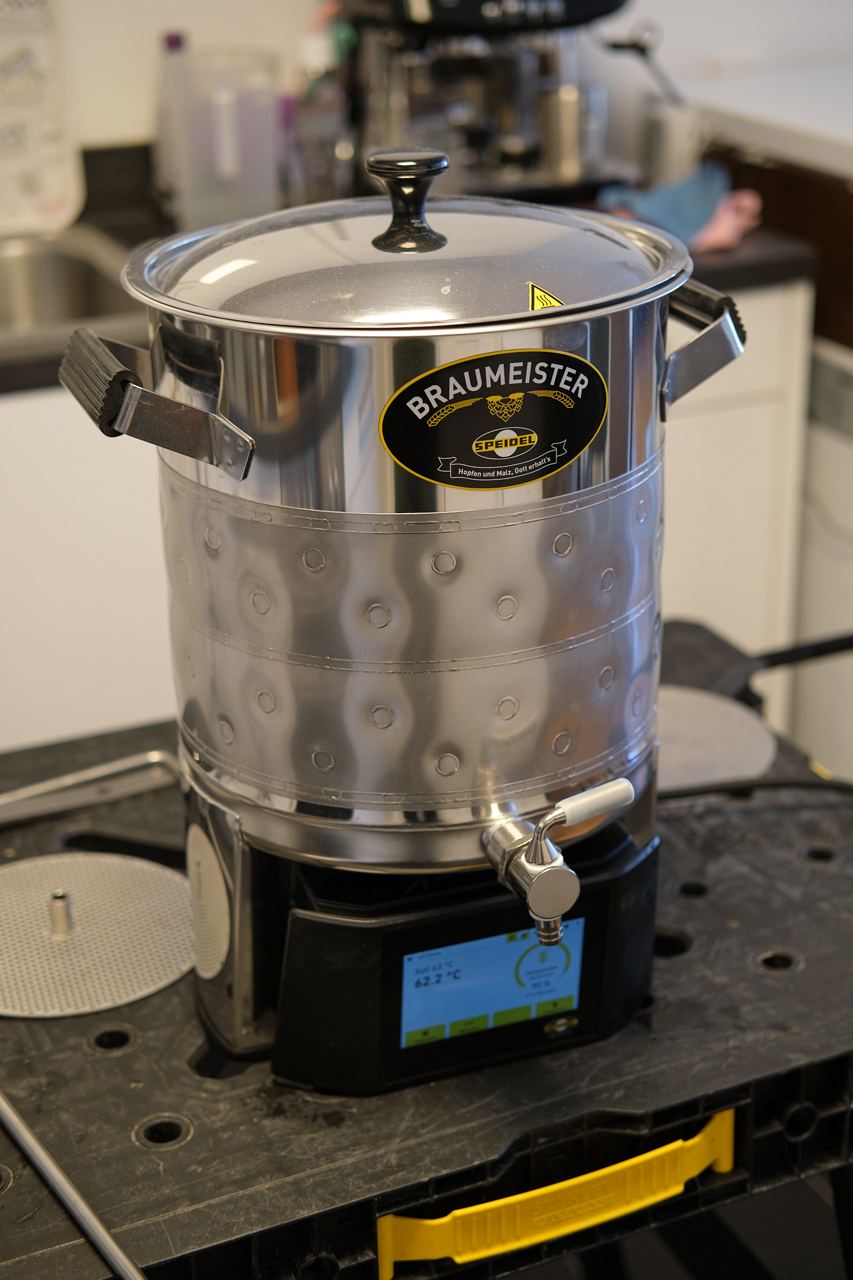
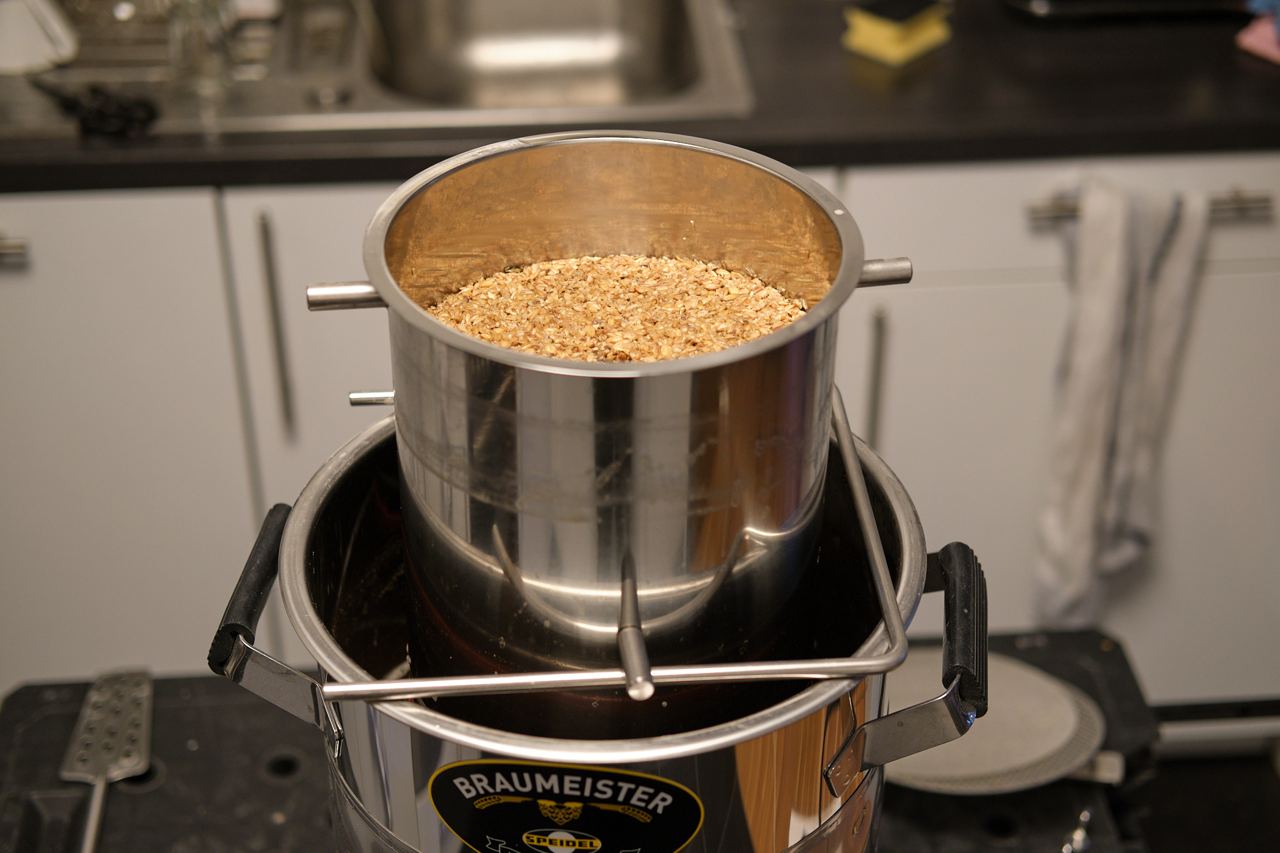
The Braumeister Plus is a single-vessel malt pipe system. What sets it apart from other malt pipe systems is that the wort is pumped from the bottom up through the malt pipe, rather than simply running through from top to bottom. The following parts are included:
- The Braumeister, with digital brewing control and an outlet tap
- A lid
- The malt pipe with a rubber seal
- Two malt screens with fine screens, one for the bottom, one for the top.
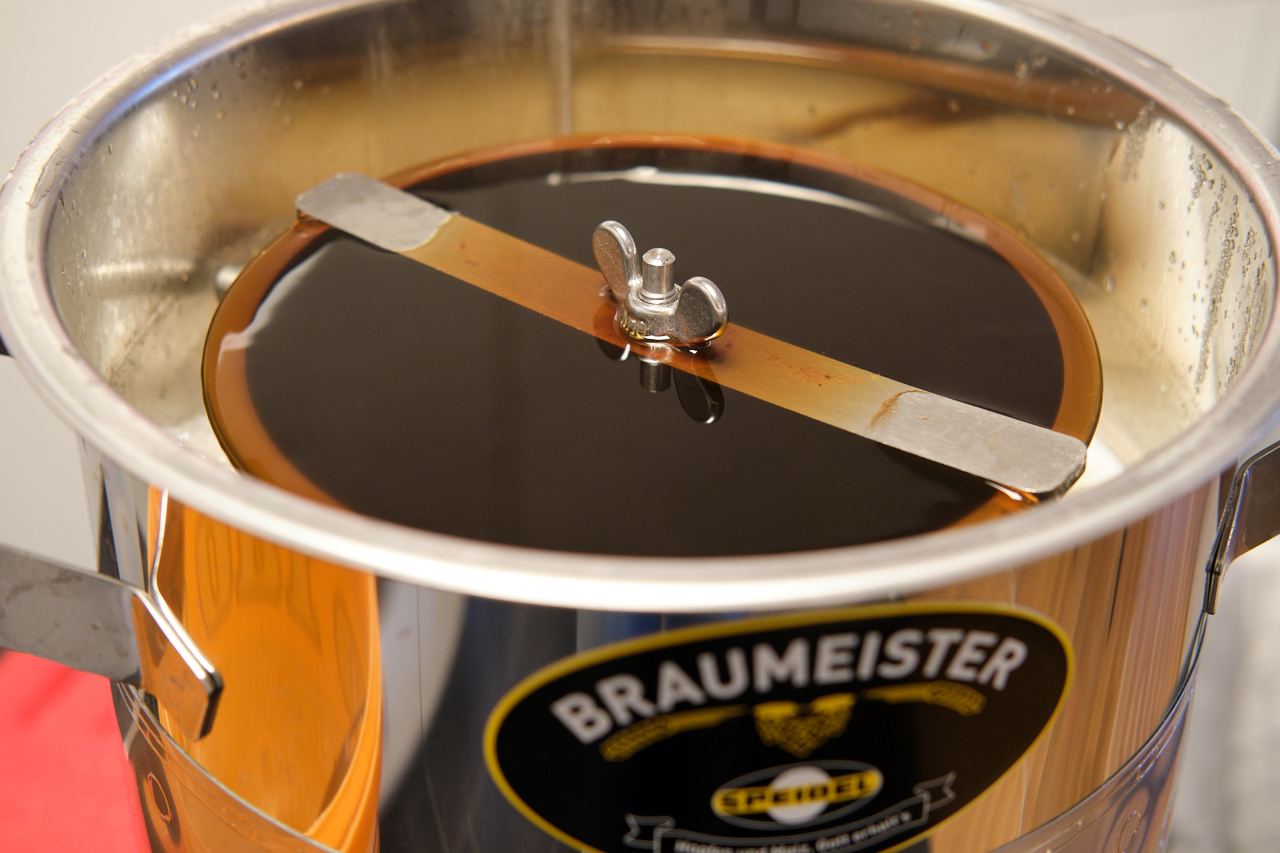
- A flat bar with a wing nut to hold the malt pipe down
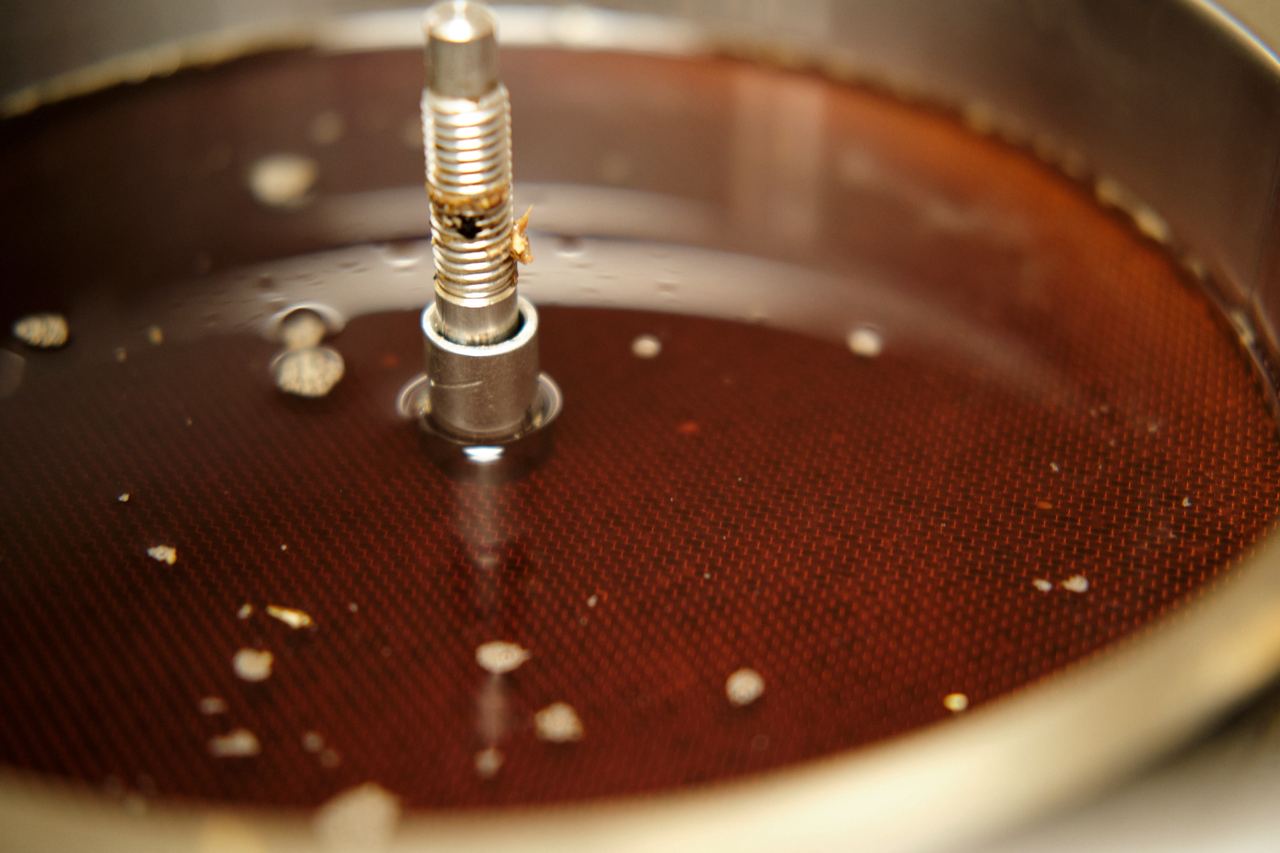
- A metal bracket to fix the malt pipe during lautering
- A handle to pull out the malt pipe
The Braumeister is heated with a heating coil installed at the bottom. In the Plus models, the Braumeister also has a cooling jacket and two Gardena connections on the back. In the middle of the Braumeister is a guide rod with markings at 8, 10, and 12 liters. The rod ensures that the malt pipe is inserted centrally and can be screwed tight with a rod and wing nut.
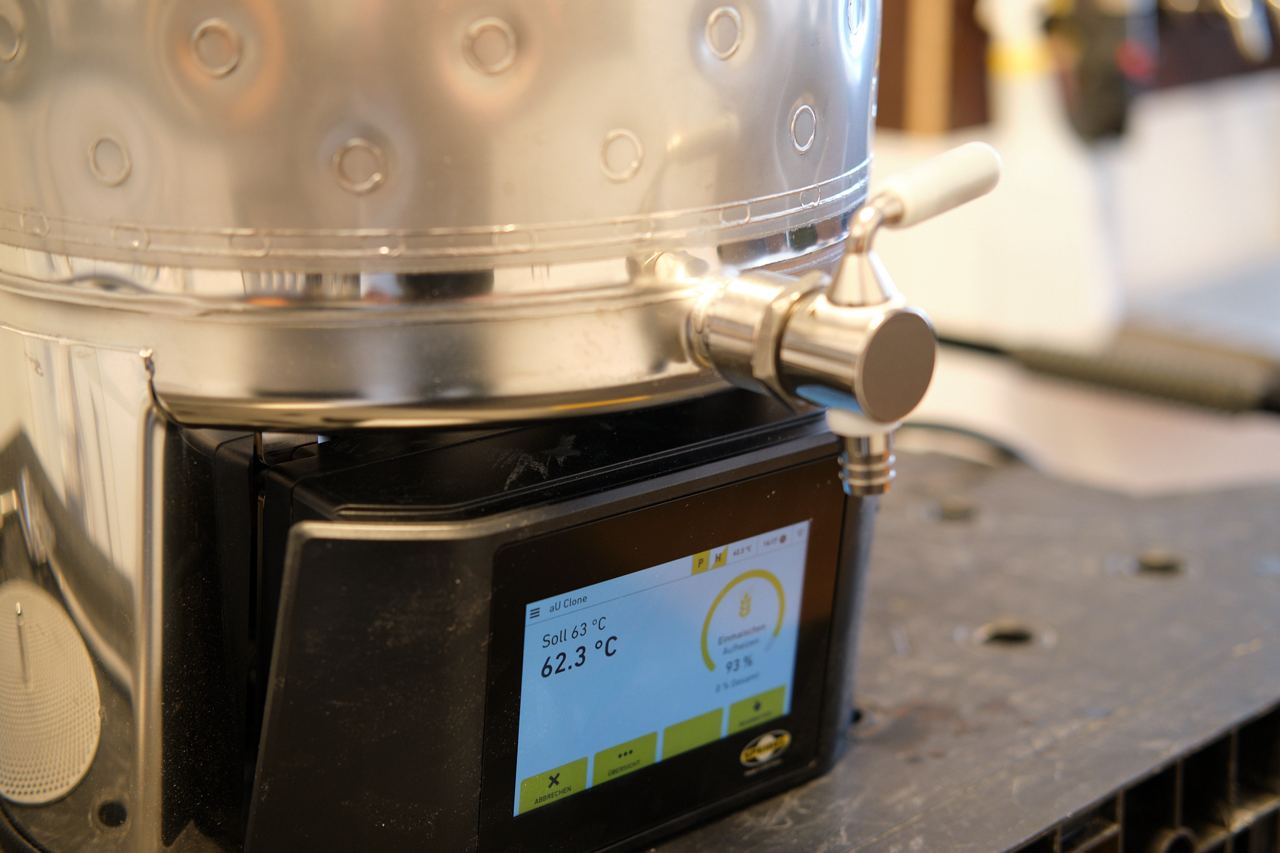 The latest version of the Braumeister features a digital touchscreen. From here, all functions of the Braumeister can be controlled. The Braumeister connects to the WLAN, and on the website, you can create your recipes and select them on the Braumeister to run all the steps automatically. The Braumeister also reminds the user of hop additions at the correct time. Of course, you can also brew manually with the brewing control, where you can regulate the temperature and turn the pump on and off.
The Brewing Process
For my experiments, I milled my malt with the Mattmill Master at the medium setting of 1.3mm. On the advice of another homebrewer, I milled the malt a second time for the last brewing session. Speidel recommends 1.6mm, but in my opinion, that's much too coarse. In a trial with 1.45mm, the flow was very good, but the efficiency was very poor. I wouldn't try any finer than double milling at 1.3mm.
With the Braumeister 10l, the strike water is always 12 liters. After this is heated to the mashing temperature, the malt pipe and the lower screens are inserted. Then the mashing in is done carefully, without spilling malt beside the malt pipe into the kettle. The malt pipe is relatively slim, so there's not much volume in it. The maximum amount of malt is 2.8kg, but I haven't gone over 2.6kg. Due to the small volume, the mash in the malt pipe becomes very, very thick, so it's essential to mash in thoroughly so that no dry lumps form.
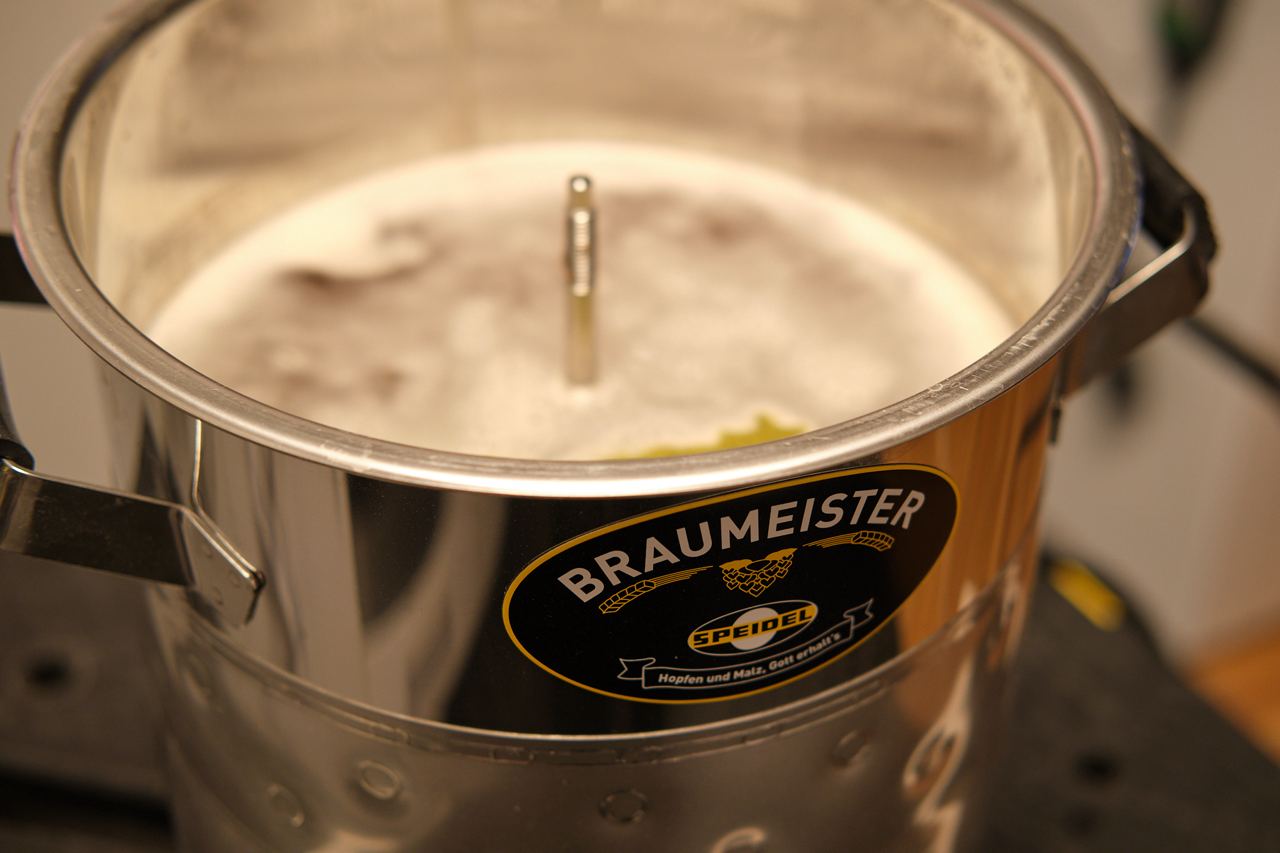
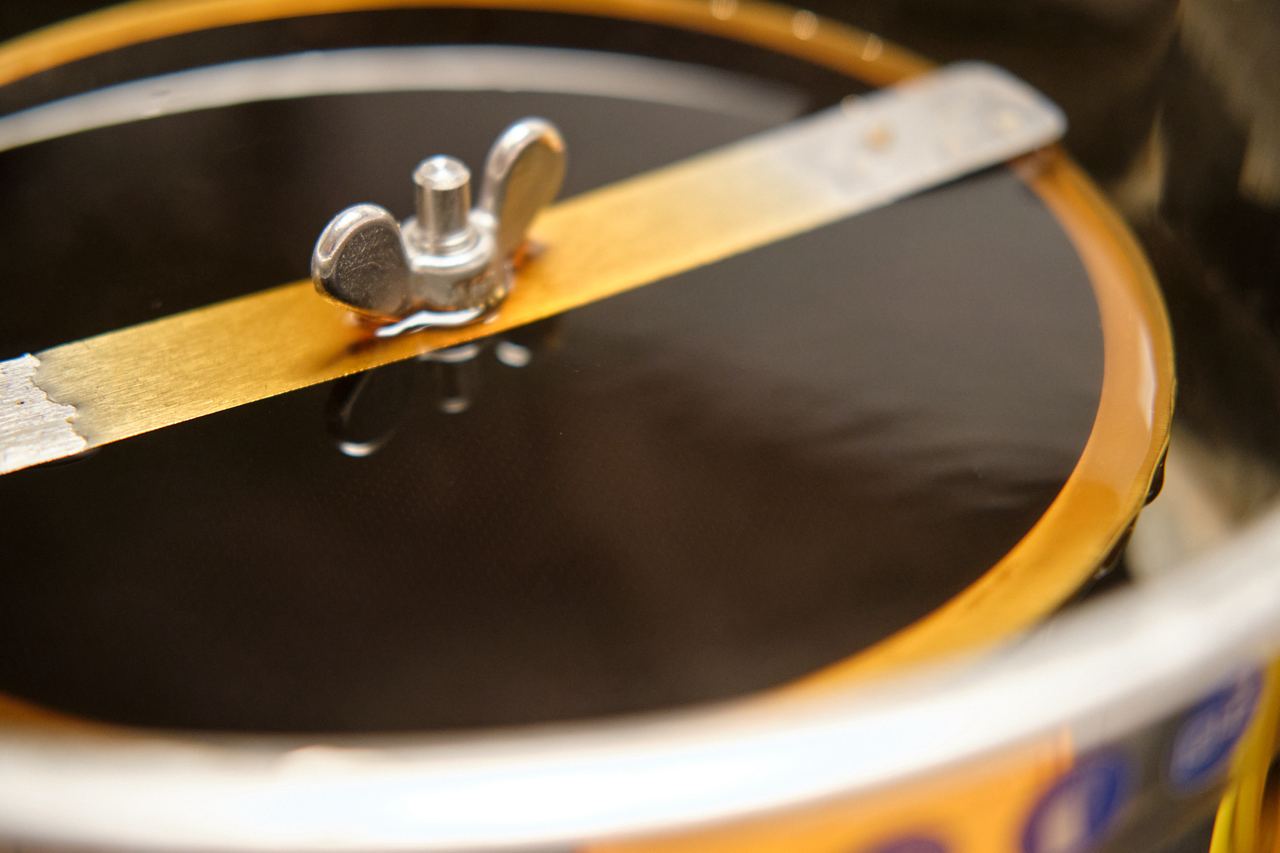 After mashing in, the upper screens are inserted, and the holding rod is screwed on. The mashing program can be activated, and the wort begins to overflow from the malt pipe.
In my trials, I mashed for about 60 minutes, sometimes longer. Time is not an issue, as the Braumeister automates everything. However, I stopped the brewing process two to three times to open the malt pipe and carefully stir the mash. The effort is negligible. Towards the end of the mashing process, the wort was always quite clear.
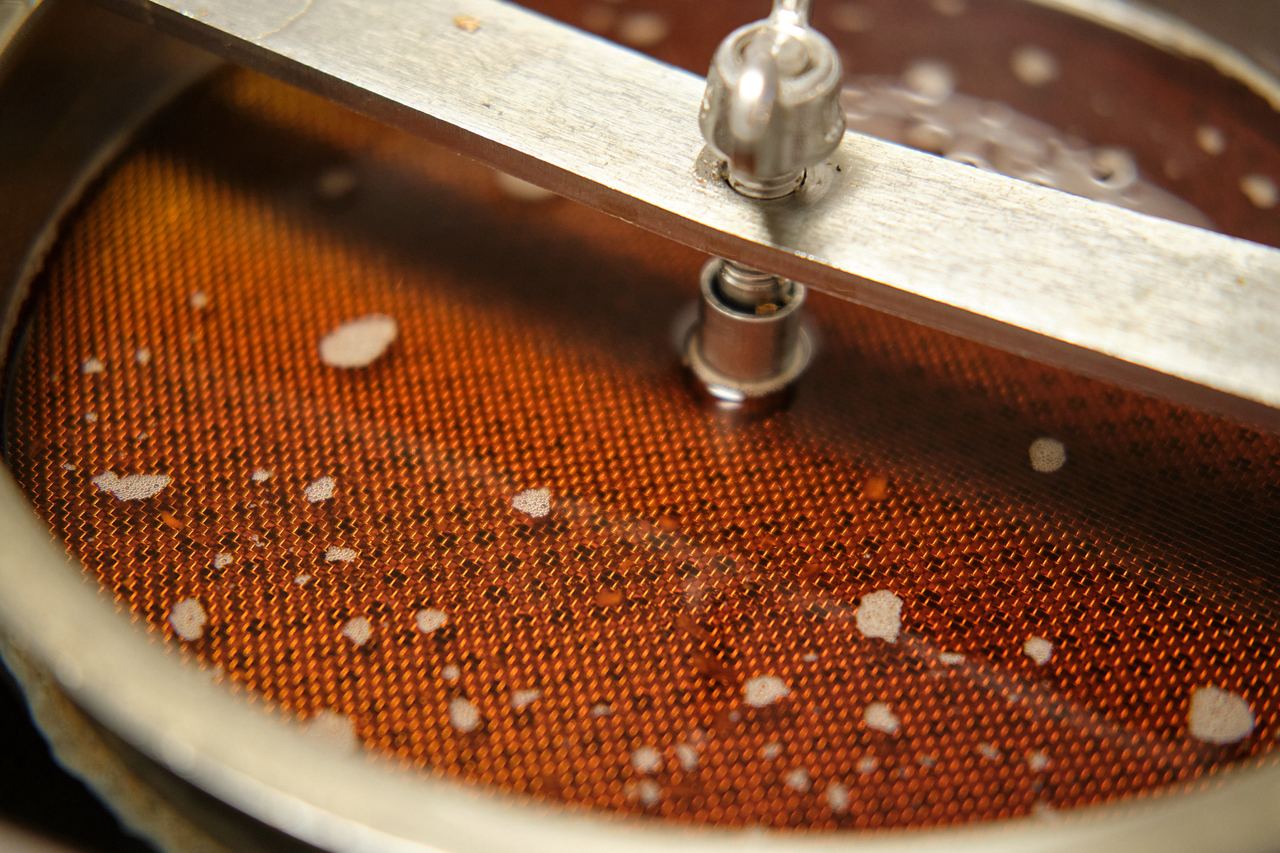 After the mashing program is complete, the Braumeister prompts the user to lift the malt pipe. There are two stages on which the malt pipe can be rested. With larger models, this may be helpful so that the malt pipe becomes lighter as the wort drains. The sparge water is applied manually, then the malt pipe is completely removed, and then the continuation of the brewing process is confirmed. In my recipes, there were about 4l of sparge water, which is relatively little, but results from the fact that a lot of volume is lying idle outside the malt pipe. With 4l of sparge water, you end up with about 14l of boil volume. After 60 minutes of boiling, that's about 12l, of which 11l end up in the fermenter.
In my trials, I achieved about 85% mash efficiency, which I consider good for a malt pipe system.
 The boiling is uneventful and runs fully automatically again. The Braumeister reminds the brewer of hop additions with a display alert and notification tone. After boiling, the wort is cooled down using the cooling jacket, and can then be drawn off from the tap on the side. The larger models also have a bottom outlet.
After the brew day, the Braumeister is cleaned. I did this with about 10l of warm water, which I heated to 50 degrees Celsius in the Braumeister, added some dishwasher powder, and scrubbed it with a sponge. I then rinsed it with clear water and turned it upside down to dry.
Advantages of the Braumeister (10l)
Compact and few parts: The number of parts of the Braumeister is manageable. This means less cleaning and less space consumption. With the Braumeister 10l, the malt pipe and the sieves even fit comfortably in a standard dishwasher. Due to its small size, it's also convenient to brew on the kitchen countertop.
Automatic: There isn't much to worry about when brewing with the Braumeister. In the best case, one only needs to be active for mashing in, sparging, and cooling.
High-Quality: The workmanship seems to be of high quality. The brewing system is likely to last significantly longer than other malt pipe systems from China.
Simplicity: The Braumeister may not do much, but what it does, it does well. One can brew very good beer without a whirlpool and other features.
Good Yield: In my trials, I have achieved about 85% mash efficiency. However, this was with repeated stirring. But I haven't made any other changes to the system. With a 1l loss due to hot break, we have a total brewhouse efficiency of about 78%.
Disadvantages
Some of these points might be nitpicking or are also found in other malt pipe systems.
Limited Original Gravity: The malt pipe is very small. To achieve the planned volume of 11 liters in the fermenter, to end up with 10l of finished beer, the limit is about 13-14°P. By boiling longer, higher original gravities can be achieved.
Volume Markings: There are markings at 8, 10, and 12 liters. However, the rod is much higher. After sparging, one has to guess, as you definitely end up with more than 12l. Why there weren't added markings at 14 and 16 liters is beyond me.
Sparging: With the "normal" amount of sparge water of four liters, the malt pipe is submerged in the wort at the end of the sparging process, so the rest can't properly drain off. Not a big deal, but a little annoying.
Cooling Jacket: If you use only the cooling jacket for cooling, it takes just under two hours (the last 10° with ice water) to cool 11 liters. If you use a small immersion chiller in series, it takes 20 to 30 minutes.
Software: While the software works well overall, there are a few minor annoyances. In some inputs, for example, only whole numbers can be entered. The mashing-in temperature cannot be higher than the first rest. So, I can't specify 66°C to then reach the first rest at 63°C, but have to mash in at 63°C, and the Braumeister then has to heat up from about 60°C to 63°C. The time is pulled via WLAN and can't be changed afterward, it is off by one hour for me. This is impractical if you want to set a start time. The start time, by the way, is not when the Braumeister is supposed to reach the mashing temperature, but when it is supposed to start heating up. When it reaches the temperature, it doesn't stop beeping until you press confirmation on the touchscreen. Well, at least you save an alarm clock in the morning.
Conclusion: For Whom is the Braumeister (10l) ideal
Overall, I find the Braumeister to be very good. If you mainly brew standard strength beers and only occasionally stronger beers, the Braumeister is excellent.
It's also a good option for brewers with limited space. The small 10l option is somewhat controversial, but I personally find it very good because the handling is extra easy with the small size, and one can brew smaller test batches. However, the choice for fermentation options in this size is limited. Some will be satisfied with a plastic fermenter, otherwise, 12 or 15l kegs are probably the best choice. Those who are very experimental and prefer to brew frequently might find the small version very appealing.
Since my brewery and thus also the fermenting vessels are designed for 23l batches, I can't use the Braumeister 10l very often, and therefore it only makes limited sense for me.